- | 0 | 前言
- | 1 | Lab util 相关
- | 2 | Lab syscall 相关
- | 3 | Lab pgtbl 相关
- | 4 | Lab trap 相关
- | 5 | Lab lazy 相关
- | 6 | Lab cow 相关
- | 7 | Lab thread 相关
- | 8 | Lab lock 相关
- | 9 | Lab fs 相关
- | 10 | Lab mmap 相关
- | 11 | Lab net 相关
- | 12 | Meltdown & RCU
| 0 | 前言
MIT 6.S081(6.828?6.1810?) 是 MIT 一门操作系统课程,课程名是 Operating System Engineering(2020年课程网址)这是我的学习笔记,包含课程讲座(LECs), xv6 Book 以及实验(Labs)。
✅最近一次更新:2024-4-23
后补内容:
LECs:
- LEC 6: xIE, xPIE, xPP bit 部分梳理
- LEC 18: OS Organization
- LEC 20: Kernels and HLL
- LEC 21: Networking
xv6 Book:
- Chapter 5:
console/uart&mtvec/timervev/CLINT梳理 - Chapter 9: Concurrency revisited
- Chapter 5:
Labs:
- Lab1 util: find & xargs 部分
- Lab8 Lock: Buffer cache 部分
- Lab11 net
💻:2018 Macbook Air
- CPU: 1.6 GHz 双核Intel Core i5
- 8G 内存
- 用虚拟机跑的 Ubuntu 22.04 LTS
或许是电脑配置太低 usertests 基本都会超时三四十秒,所以延长了一点测试时间。(也可能是我代码的问题,不过暂时不优化了)。
笔记中像这样引用的句子为课程中的原文。
🔗 我的 Lab 代码链接
🔗【知乎-肖宏辉】MIT6.S081 操作系统工程中文翻译
| 1 | Lab util 相关
| 1.1 | LEC 1 & Chapter 1 note
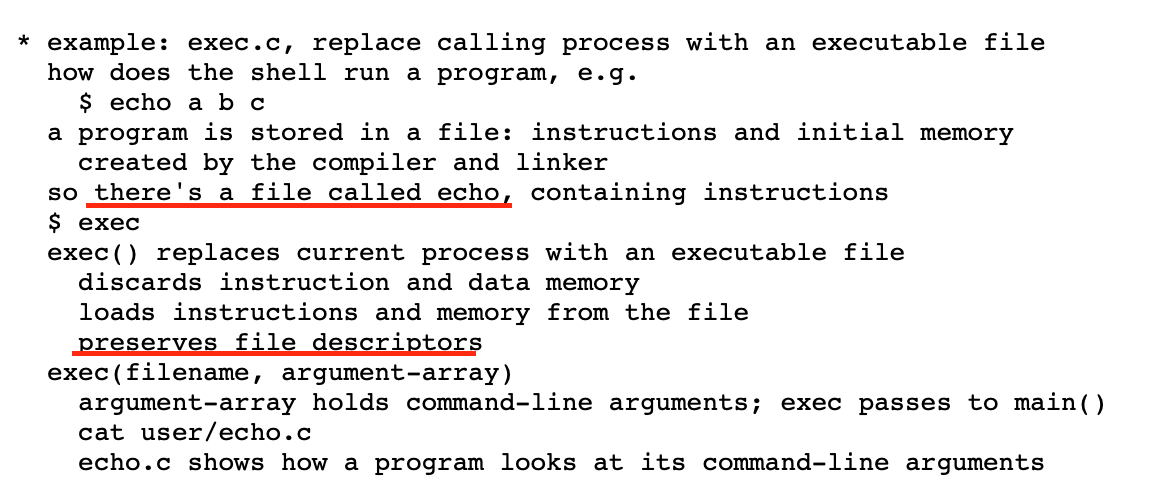
exec
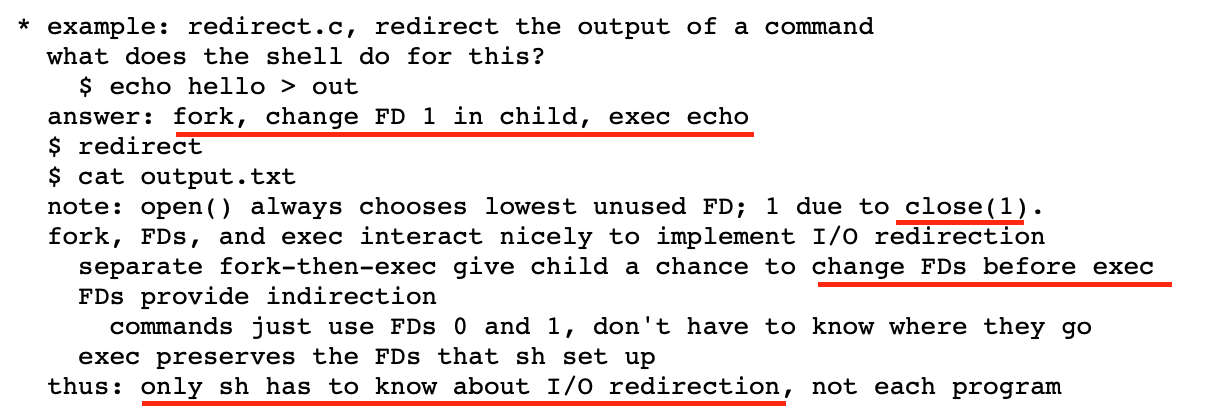
redirect
cat < input.txt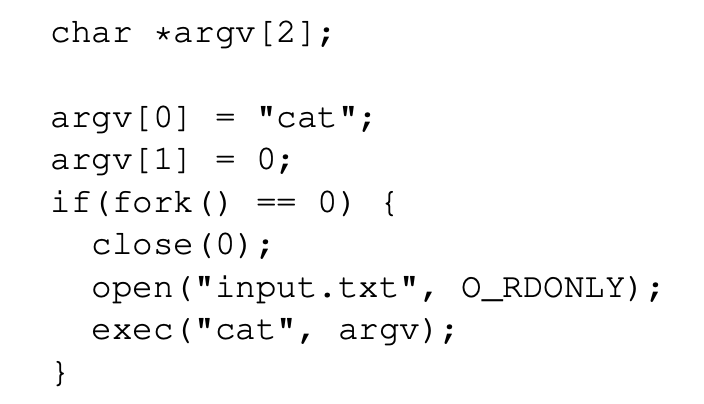
The
2>&1tells the shell to give the command a file descriptor 2 that is a duplicate of descriptor 1pipe
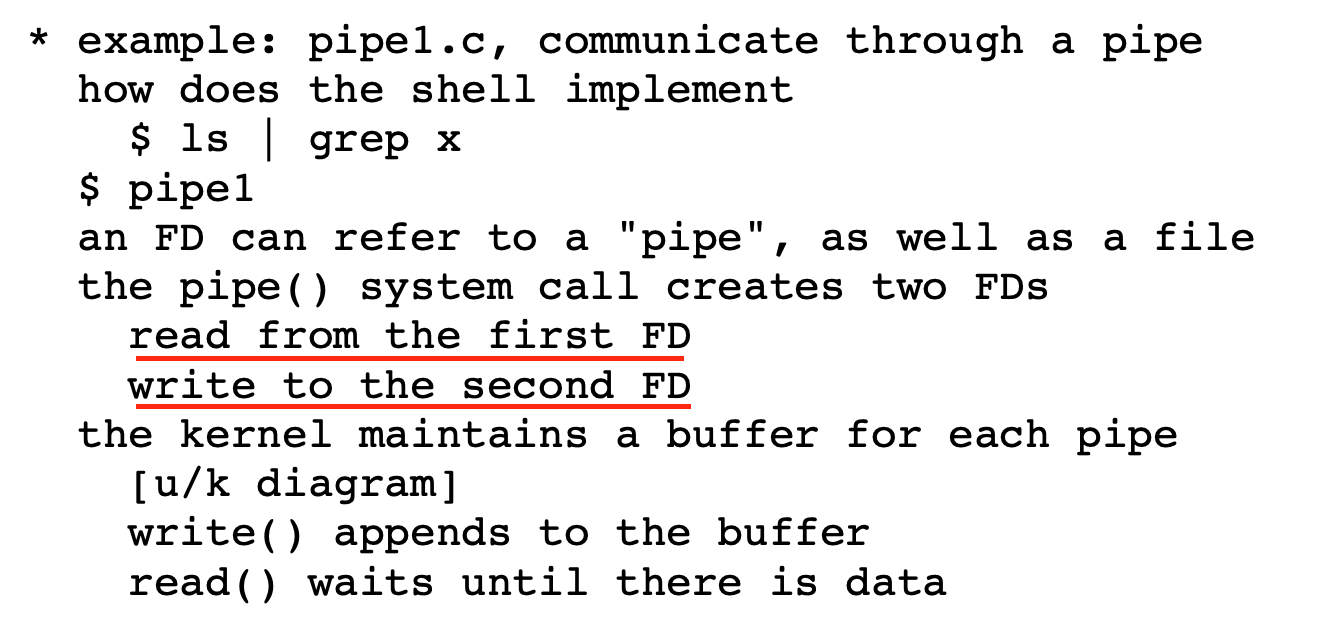

在
fork之前创建pipe然后把ls的stdout(1)换成pipefd[1];grep的stdin(0)换成pipefd[0]。File System
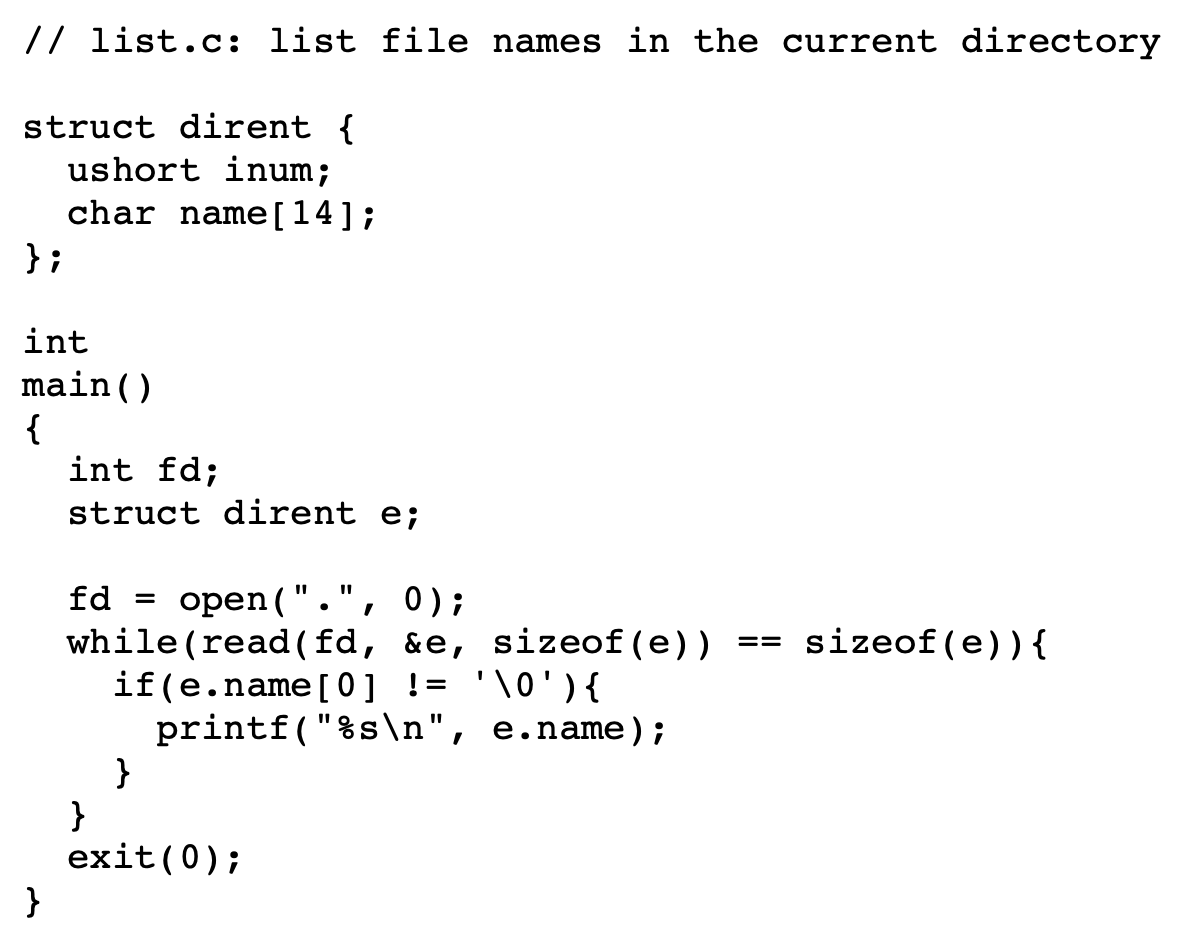
list
a file
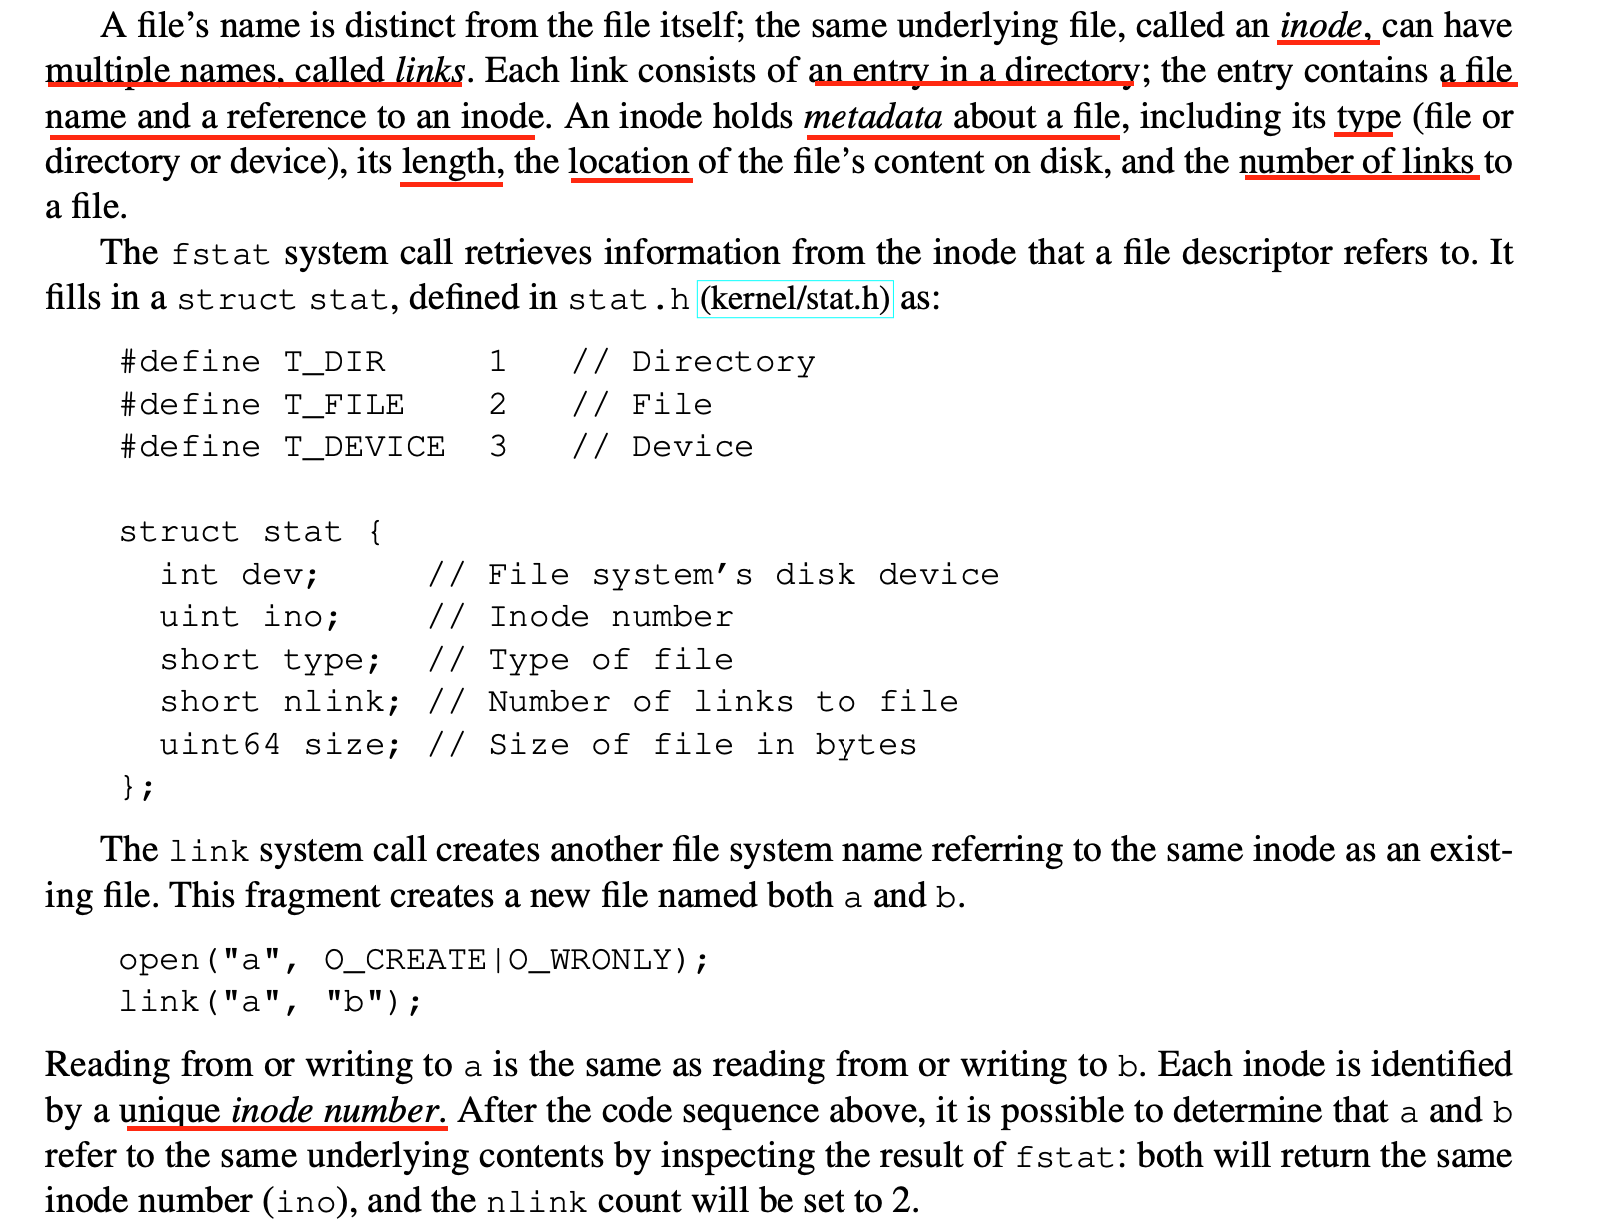
The file’s inode and the disk space holding its content are only freed when the file’s link count is zero and no file descriptors refer to it.
cd

| 1.2 | LEC 2 note
Use GNU debugger
Conditional breakpoints
break <location> if <condition>sets a breakpoint at the specified location, but only breaks if the condition is satisfied.cond <number> <condition>adds a condition on an existing breakpoint.Watchpoints
watch <expression>will stop execution whenever the expression’s value changes.watch -l <address>will stop execution whenever the contents of the specified memory address change.What’s the difference between wa var and wa -l &var?
rwatch [-l] <expression>will stop execution whenever the value of the expression is read.
| 1.3 | Lab: Xv6 and Unix utilities
This lab will familiarize you with xv6 and its system calls.
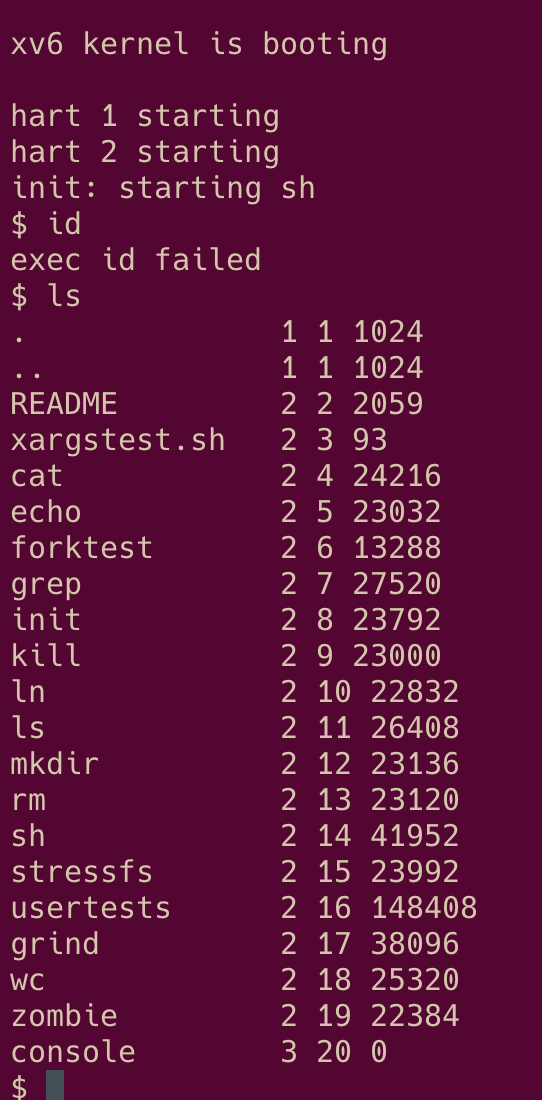
| 1.3.1 | Boot xv6 (easy)
sudo apt-get install qemu-system-misc=1:4.2-3ubuntu6失败参考下面的手动编译方法编译 qemu
- 补充:
sudo apt-get install libpixman-1-dev安装 pixman devel packag
- 补充:
| 1.3.2 | sleep (easy)

| 1.3.3 | pingpong (easy)
为了阻止父进程在向管道写了数据后立刻把数据读出来,使得子进程不能读到数据,可以在父进程调用 write(pipefds[1], "c", 1); 后接着调用 sleep 。

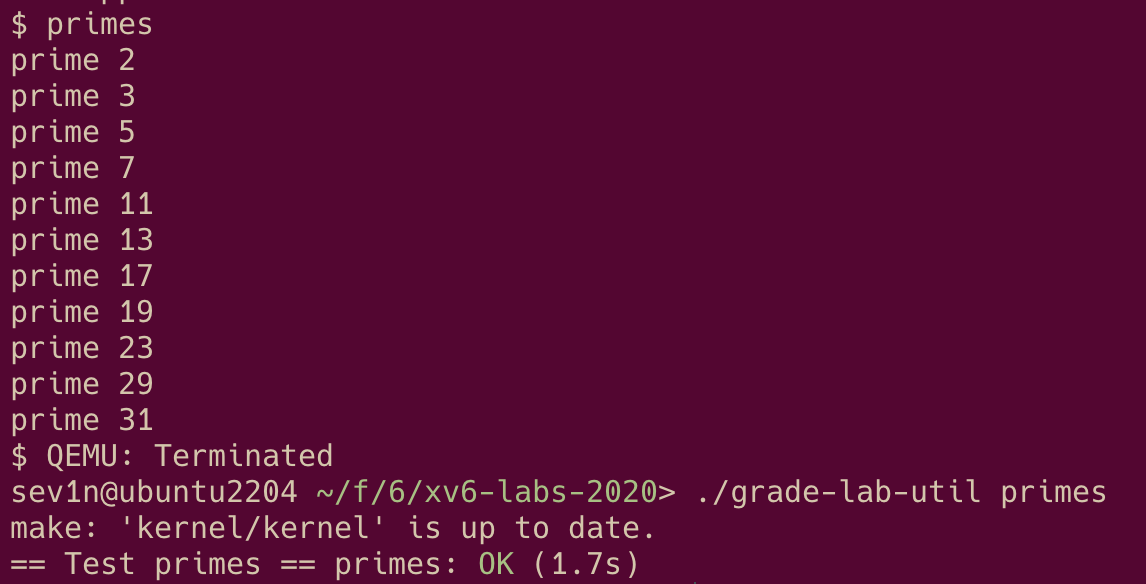
| 1.3.4 | primes (moderate)/(hard)
| 1.3.5 | find (moderate) & xargs (moderate)
后补
| 2 | Lab syscall 相关
| 2.1 | Chapter 2 note & LEC 3 note
Thus an operating system must fulfill three requirements: multiplexing, isolation, and interaction.
Multiplexing 多路复用,也就是分时(time-sharing),防止某个进程持续占有 CPU。
Isolation 隔离,为减少某些不受信任的应用对其他的影响。
Interaction 交互,为实现进程之间的信息交互,实现更复杂的功能。
| 2.1.1 | Abstracting physical resources
To achieve strong isolation it’s helpful to forbid applications from directly accessing sensitive hardware resources, and instead to abstract the resources into services.
Unix transparently switches hardware CPUs among processes, saving and restor- ing register state as necessary
Many forms of interaction among Unix processes occur via file descriptors.
| 2.1.2 | User mode, supervisor mode, and system calls
RISC-V has three modes in which the CPU can execute instructions: machine mode, supervisor mode, and user mode.
An application can execute only user-mode instructions is said to be running in user space.
The software in supervisor mode can also execute privileged instructions and is said to be running in kernel space.
The software running in kernel space (or in supervisor mode) is called the kernel.
CPUs provide a special instruction that switches the CPU from user mode to supervisor mode and enters the kernel at an entry point specified by the kernel. (RISC-V provides the
ecallinstruction)
| 2.1.3 | Kernel organization
monolithic kernel: entire operating system resides in the kernel
在宏内核(monolithie kernel)情况下,内核等于操作系统。
bad: no isolation within (subsystems)
微内核(microkernel)暂时不考虑。
| 2.1.4 | Process overview
The unit of isolation in Unix is a process.
隔离包括进程(processes)之间的隔离,以及进程和内核之间的隔离。
进程提供了一个看上去私有的内存空间即地址空间(address space)。
地址空间通过页表(page tables)实现。
| 2.1.5 | Code: starting xv6 and the first process
_entry -> start -> main -> userinit -> /init
| 2.2 | Lab: system calls
1 | sev1n@ubuntu2204 ~/f/6/xv6-labs-2020> ./grade-lab-syscall syscall!? |
| 2.2.1 | System call tracing (moderate)
注意 sys_trace 成功时返回值为 0
📌 这部分代码在这里 (没注意把 .gdb_history 提交了)
| 2.2.2 | Sysinfo (moderate)
xv6 的内存管理机制
通过单链表
freelist连接所有闲置的 PAGE,每次从头(kmem->freelist)存取
📌 这部分代码在这里
| 3 | Lab pgtbl 相关
| 3.1 | Chapter 3 & LEC 4 note
| 3.1.1 | Paging hardware
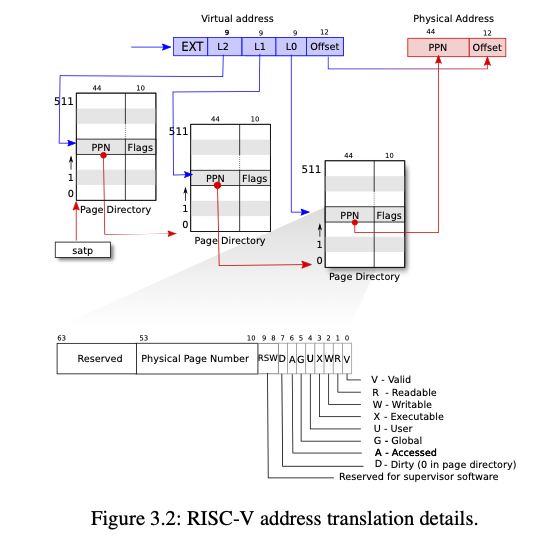
PTE_Ucontrols whether instructions in user mode are allowed to access the page;
satp 寄存器保存 l2 页表的物理地址
虚拟地址到物理地址的翻译过程:
- 当前进程的
satp寄存器找到 l2 页表物理地址 - 通过 l2 的 9 比特(bits 和 2^9=512 个 PTE 一一对应)找到对应的 44 比特 PPN。
l2_pte = l2_pgtbl[PX(2, va)]
- 通过 l2 PPN 找到 l1 页表的物理地址。
l1_pgtbl = PTE2PA(l2_pte)
- 通过 l1 的 9 比特找到 l0 页表的物理地址。
l0_pgtbl = PTE2PA(l1_pgtbl[PX(1, va)])
- 通过 l0 的 9 比特找到对应页的物理地址(A)。
l0_pte = l0_pgtbl[PX(0, va)]
- 得到最终物理地址
pa = PTE2PA(l0_pte) | (va & PGSHIFT)
为什么多级页表可以节省内存?
- 使用多级页表,程序一开始只需要三个页表(3*512 PGSIZE),l2,l1 页表内都只有一个页表项(pte),其他空余的位置不需要分配页表项,等需要的时候再分配。
1 | // kernel/riscv.h |
| 3.1.2 | Kernel address space
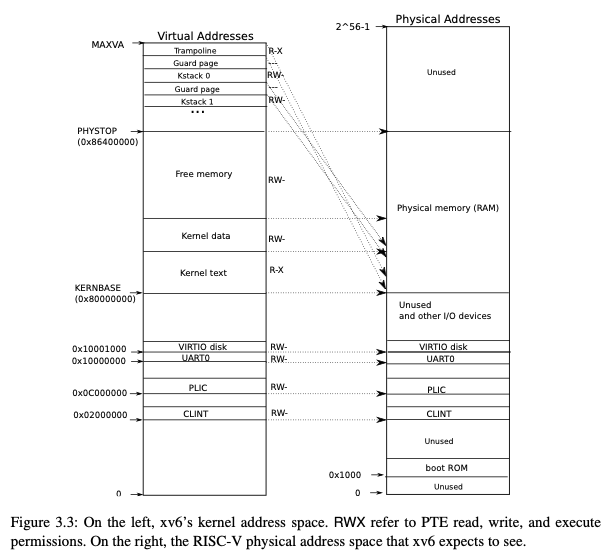
| 3.1.3 | Code: creating an address space
1 | kinit->kvminit->kvminithart->procinit |
kinit把内核数据段结束(.data)到定义的PHYSTOP之间的地址分页,组织到freelist链表里。kvminit- 首先调用
kalloc分配一页 作为内核页表(kernel_pagetable)。 - 调用
kvmmap映射上一节(3.1.2)的地址 kvmmap调用mappages(kernel_pagetable, va, sz, pa, perm)mappages调用pte = walk(pagetable, a, 1)把虚拟地址va映射到内核页表。
- 首先调用
kvminithart设置satp寄存器并清空 TLB 缓存。procinit- 调用
kvmmap给KSTACK宏计算出来的内核栈虚拟地址映射物理地址。 - 调用
kvminithart
- 调用
注意:
kalloc分配的一页可以作为一个页表。因为PAGESIZE是 4096B 也就是 8*512B,页表项只用了 54 bit 不到 8B,所以是够的。procinit最后还要再调用一次kvminithart因为”当内核修改页表时,它需要通知硬件关于这些变化,以便处理器能够使用最新的页表进行地址转换。” (by chatGPT)。存疑?
| 3.1.4 | Code: exec
把存在文件系统的一个文件加载到内存同时初始化用户地址空间(address space)
在检查完文件格式后 exec 会分配一个新的页表 ,给每个 ELF 段(segment) 分配并加载到内存。
Execallocates a new page table with no user mappings withproc_pagetable, allocates memory for each ELF segment withuvmalloc, and loads each segment into memory withloadseg.loadseguseswalkaddrto find the physical address of the allocated memory at which to write each page of the ELF segment, andreadito read from the file.
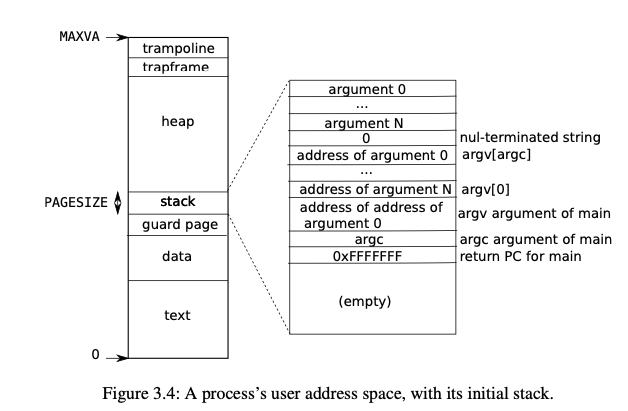
给用户栈(ustack)分配一页然后初始化。
Execcopies the argument strings to the top of the stack one at a time, recording the pointers to them inustack. It places a null pointer at the end of what will be theargvlist passed tomain. The first three entries inustackare the fake return program counter,argcandargvpointer.
分配一个 guard page 在 ustack 的上方。
| 3.2 | LEC 5 note
1 | reg | name | saver | description |
| 3.3 | Lab: page tables
| 3.3.1 | Print a page table (easy)
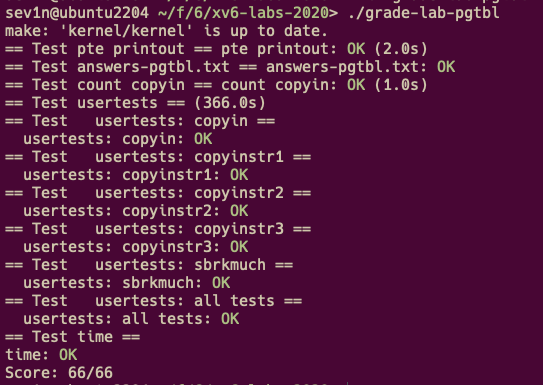
📌 这部分代码在这里
| 3.3.2 | A kernel page table per process (hard)
为什么每个进程都需要一个内核页表?
- 用户态页表使得用户态可以直接访问虚拟地址(由硬件来翻译)
- 但是当陷入内核态时,内核的页表没有用户态的虚拟地址,所以不能直接访问用户虚拟地址
- 为了访问用户虚拟地址,xv6 通过
walk函数把来自用户态的虚拟地址转换成内核可操作的物理地址 - 当每个进程有自己的内核页表时的时候,把
satp设置成内核页表的地址就可以直接访问用户态虚拟地址了
所以 proc 结构体在初始化时,多维护一个 kpagetable,首先映射(map)内核空间,然后当用户页表更新时,同时更新内核页表;在切换进程时也需要切换全局内核页表(调度器内核页表)。
需要注意的几点:
- 每个进程在创建时都需要设置好内核页表,包含一下几点,分配其空间(一页),映射内核地址空间。
- 进程的创建在
allocproc(),它被userinit()和fork()调用。
- 进程的创建在
- 每个进程都有内核栈(kstack),在之前的版本,所有的内核栈都被
procinit映射到全局的内核页表。现在映射内核栈需要在分配好内核页表之后。 - 这一节只需要保持
kpagetable和全局变量kernel_pagetable一致,所以还要再把内核栈映射到全局kernel_pagetable,不用同步更新内核页表。
释放内核页表(参考 proc_freepagetable)
- 清理叶子结点。
- 调用
freewalk释放占用的物理页框。
📌 这部分代码在这里
| 3.3.3 | Simplify copyin/copyinstr (hard)
为了防止用户地址空间和内核地址空间重叠所以需要限制用户虚拟地址上限是 0xC000000。为了内核页表能访问用户态虚拟地址,需要保持内核页表和用户页表在用户地址空间一致。之前的 kernel_pagetable 映射了 CLINT(0x2000000),如果限制 MAXUVA 是 CLINT 的话通过不了 usertests sbrkmuch 所以可以不用映射 CLINT 。
用户页表的创建/更新过程如下:
proc_pagetable()- 调用
uvmcreate()获得一个物理页框。 - 然后
mappages()映射trampoline以及trapframe。
- 调用
fork()- 先调用
allocproc()获得一个基本的用户页表。 - 然后
uvmcopy()复制父进程的页表即可。
- 先调用
userint()- 同样是
allocproc()起手。 - 然后调用
uvminit把initcode映射到va=0的位置。
- 同样是
exec()见 | 3.1.4 |sbrk()growproc()根据传入参数正负调用uvmalloc/uvmdealloc。uvmalloc()从原来的虚拟地址往上分配页。uvmdealloc()从原来的虚拟地址往下减少页。
内核页表应该只建立相同映射,不再分配和释放物理帧。
用户页表释放过程:
freeproc()在proc_freepagetable()的时候也要对内核页表同样操作。exec()会释放原来的用户页表。- 因为有
kstack,kpagetable应随着进程的创建释放而创建释放。
注意:
限制用户地址空间不超过:
p->sz是当前进程占用内存大小,限制它即可。写
p->sz的地方只有两处是用变量赋值的分别是。1
2exec.c:114:3: p->sz = sz;
proc.c:264:3: p->sz = sz; // growproc这两个
sz都是uvmalloc()的返回值,所以在这里限制就可以。
当
execgoto bad的时候,kpagetable必须和刚开始一样。
梳理完 user pagetable 机制之后终于是清晰了很多,但是 debug 还是痛苦且漫长。做出来之后还是很有成就感(笑)
📌 这部分代码在这里
| 4 | Lab trap 相关
| 4.1 | Chapter 4 & LEC 6 note
There are three kinds of event which cause the CPU to set aside ordinary execution of instructions and force a transfer of control to special code that handles the event.
- system call(
ecall) - exception
- device interrupt
不会翻译 trap 就直接写英文了。
tarp 应该是 tansparent,尤其对于中断,因其随时可能发生。
While commonality among the three trap types suggests that a kernel could handle all traps with a single code path, it turns out to be convenient to have separate assembly vectors and C trap handlers for three distinct cases: traps from user space, traps from kernel space, and timer interrupts.
| 4.1.1 | RISC-V trap machinery
What does the CPU’s “mode” protect?
i.e. what does switching mode from user to supervisor allow?
supervisor can use CPU control registers:
- satp – page table physical address
- stvec – ecall jumps here in kernel; points to trampoline
- sepc – ecall saves user pc here
- sscratch – address of trapframe
- scause – a number put by RISC-V that describes the reason for the trap
- sstatus: supervisor status register
- …..
supervisor can use PTEs that have no PTE_U flag
but supervisor has no other powers! e.g.
- can’t use addresses that aren’t the in page table(注意:这是当
satp的 mode bit 不为 0 的情况下,所以如果一个在 S-mode 下设置satp=0则可以直接访问物理地址)
so kernel has to carefully set things up so it can work
如何识别 RISC-V CPU 处于什么模式/xIE, xPIE, xPP bit 是怎么作用的(x = M/S/U)
后补
| 4.1.2 | Traps from user space
1 | preview: |
ecalldid three things:
- change mode from user to supervisor
- save
pcinsepc- jump to
stvec(the kernel previously setstvec, before jumping to user space)
uservec():- 保存 32 个用户寄存器(用于恢复)
- 切换到内核页表, 内核栈
- 跳(jump)到
usertrap()
usertrap()- 修改
stvec = kernelvec - 根据
scause调用不同的处理函数(handler) usertrapret()
- 修改
usertrapret()- 设置
stvec = uservec - 在 trapframe 中保存以下未在
tampline.S保存的值, 也是初始化新的 trapframe 的地方:kpagetable所以uservec可以切换kstack所以uservec可以切换hartid, 可能被其他 CPU 调度要更新usertrap地址,让uservec找得到
- 设置
sstatus寄存器 - 设置
sepc = trapframe->epc
- 设置
userret()- 切换
satp= 用户页表 - 恢复 32 个 用户寄存器
sret
- 切换
sret- set
sstatus“previous mode” bit to user - 恢复
pc=sepc
- set
| 4.1.3 | Traps from kernel space
kernelvec保存 31 个寄存器到内核栈
调用
kerneltrap恢复寄存器
sret
| 4.2 | Lab: traps
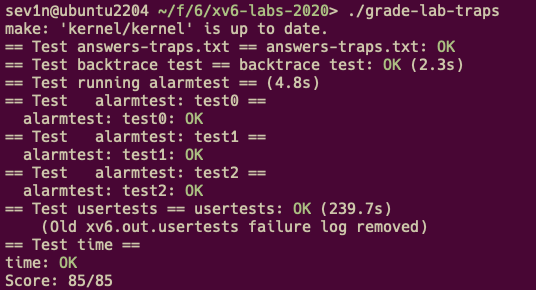
| 4.2.1 | RISC-V assembly (easy)
a0~a7,a2holds 13 when callingprintfin main.fandgis called in compiler.printfis located at0x628rais 0x38out put is “HE110 Worid”, if big-endian
i = 0x726c6400.57616need not to be changed.after “y=”, it will print
(int)$a2, because the 2nd arguement of format strings isa2.
| 4.2.2 | Backtrace (moderate)
提交记录有点乱,就直接贴 diff 了
1 | diff --git a/kernel/defs.h b/kernel/defs.h |
| 4.2.3 | Alarm (hard)
📌 这部分代码在这里
| 5 | Lab lazy 相关
| 5.1 | Chapter 4.6 & LEC 8 note
Key idea: change page tables on page fault, update page table instead of panic and restart instruction.
Information we might need at page fault to do something interesting:
- The virtual address that caused the fault
Seestvalregister; page faults set it to the fault address- The type of violation that caused the fault
Seescauseregister value (instruction, load, and Store page fault)- The instruction and mode where the fault occurred
- User IP:
tf->epc- U/K mode: implicit in usertrap/kerneltrap
| 5.1.1 | Lazy Allocation
sbrkallocates memory that may never be used.
plan: allocate physical memory when application needs it
- Adjust
p->szonsbrk, but don’t allocate.- When application uses that memory, it will result in page fault.
- On pagefault allocate memory resume at the fault instruction.
除此以外,在 unmap 的时候,对延迟分配(lazy allocation) 还未分配的内存应该不处理,继续循环。
| 5.1.2 | Copy-On-Write (COW) fork
| 5.1.3 | 其他
Zero Fill Page
bss段(segment) 最开始都是 0,所以可把 bss 虚拟地址先映射到同一页且只读。当向 bss 写时触发缺页错误(page fault),然后再该映射虚拟地址对应页。
Demand Paging
idea: load pages from the file on demand.
- allocate page table entries, but mark them on-demand.
- on fault, read the page in from the file and update page table entry.
- need to keep some meta information(Virtual Memoroy Area) about where a page is located on disk.
- Paging From Disk
idea: store less-frequently used parts of the address space on disk. page-in and page-out pages of the address address space transparently.
Memory-Mapped Files
放在 mmap lab 讨论
| 5.2 | Chapter 5 & LEC 9 note
interrupts
the interrupt tells the kernel the device hardware wants attention.
new issues:
- asynchronous: between running process and interrupt handler
- concurrency: device and process run in parallel
- programming devices: device can be difficult to program
中断的来源
device -> PLIC(Platform Level Interupt Control) -> CPU
内核通过对 PLIC 编程灵活处理中断。
驱动(driver) 负责管理特定的设备:
configures the device hardware.
tells the device to perform operations.
handles the resulting interrupts.
interacts with processes that may be waiting for I/O from the device.
Many device drivers execute code in two contexts:
- a top half that runs in a process’s kernel thread called via system calls.
- a bottom half that executes at interrupt time as interrupt handler handling device interupt.
| 5.2.1 | Code: Console input/output
当 xv6 启动时,$ 是如何被打印到屏幕?
当用户在键盘敲下 ls\n 时,屏幕是如何显示 ls 以及 ls 执行的内容的?
涉及 console/uart 的梳理,后补
| 5.2.2 | Timer interrupts
涉及 mtvec/timervev/CLINT 后补
| 5.3 | Lab: xv6 lazy page allocation


| 5.3.1 | Lazy allocation (moderate) && Lazytests and Usertests (moderate)
sbrk()不分配物理内存,只修改p->sz什么时候分配:
- 用户访问时触发用户触发缺页异常时(usertrap->page fault),再分配
- 用户读写
sbrk()返回的地址时,由于 xv6 是软件层面pa = walkaddr(va),所以 此时也需要分配。
注意 :
va = p->sz的时候是非法的。- 如果
sbrk(n) < 0, 需要sbrk()释放(unmap) 参考uvmdealloc()。否则p->sz减小后,上面的虚拟地址 没有 unmap 且已经丢失。
📌 这部分代码在这里
| 6 | Lab cow 相关
The goal of copy-on-write (COW) fork() is to defer allocating and copying physical memory pages for the child until the copies are actually needed, if ever.
uvmcopy()walk()父进程的页表,*pte &= ~PTE_W,*pte |= PTE_C- 映射到子进程的页表, 引用次数增加(reference count ++);
usertrap()- 在缺页异常的时候,识别出 COW 页。
- 分配物理内存, 分配失败则杀死(kill)。
- 复制原数据
- 修改页表项(PTE) 指向新的物理帧且可写,原页的
reference count-- - 重新执行
proc_freepagetable()- 如果是 COW 页,
--reference count == 0则 释放
- 如果是 COW 页,
reference count如何实现- NPROC = 64,小于 0xff
- 计算
freerange()创建了多少页,然后根据该数量减去内存(见下面的kalloc.c-kinit())。 kvmmap()的时候不应该设置ref count,因为其是表示当前页被用户页表引用的数量。kalloc()时 设置cnt = 0mappages()的时候,cnt++uvmunmap()且 do_free 时cnt--cnt==1则修改 pte 即可。
copyout()- 和
usertap()类似操作
- 和
| 6.1 | Lab: Copy-on-Write Fork for xv6
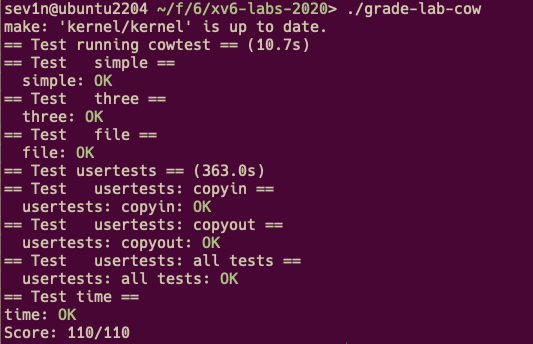
1 | diff --git a/kernel/defs.h b/kernel/defs.h |
| 7 | Lab thread 相关
| 7.1 | Chapter 6 & LEC 10 note
- concurrency problems - race conditions
- broken acquire - 使用硬件提供的原子操作(test&set …)
- lock problems - performance/deadlock
- mem ordering
- sleep lock
- 为什么 sleep lock 不用关闭中断
| 7.2 | Chapter 7 & LEC 11 note & LEC 13 note
为了允许多于 CPU 数量的进程“同时”运行,操作系统需要提供多路复用(Mutiplexing) 包括 CPU 在内的共享资源。
多路复用面临的挑战:
how to switch from one process to another? idea is sample but implementation is opaque.
how to force switches in a way that is transparent to user processes? - timer interrupts
a locking plan is necessary to avoid races, for CPUs may be switching among processes concurrently.
cannot free a process’s memory and other resources when the process exits because (for example) it can’t free its own kernel stack while still using it.
each core of a multi-core machine must remember which process it is executing so that system calls affect the correct process’s kernel state. -
myproc()races(the loss of wakeup) in
sleepandwakeup.
| 7.2.1 | switch & scheduling
1 | overview of thread switching in xv6 |
swtch()只保存被调用者保存(callee saved)寄存器。
swtch()返回到new->context->ra指向的地址,该地址是这个新线程之前调用swtch()的返回地址(sched()/forkret()/scheduler())。进程在准备让出 CPU 之前必须满足几个要求:
获得自己的
p->lock,以保护p->state,cpu->proc。如果没有p->lock在当前 CPU 执行yeild()和scheduler():swtch()之间,其他的 CPU 很可能调度到此进程,此时两个 CPU 共用同一个内核栈。修改进程的状态(
p->state),修改成SLEPPING/RUNABLE/ZOMBIE。这样的函数有:
sleep(),yield(),exit()。
scheduler()- 打开中断,遍历
proc[]找到一个RUNNALBE进程(p)(首先会申请当前进程的锁p->lock)。 - 更新
p->state为RUNNING,c->proc为当前进程。 - 调用
swtch()到进程 p。 - 当被
sleep()/yield()/exit()调用sched()切换回来时,清空c->proc, 释放p->lock。 - 如果当前只有
init和sh两个进程,则打开中断并执行指令wfi等待中断,否则继续执行。 - 重复 1. 。
- 打开中断,遍历
mycpu()mycpu()要求调用者关闭中断,直到使用完mycpu()返回的值为止。- 因为如果在这期间被中断,
hartid会被修改,导致索引有误。
myproc()- 关中断。
- 保存
mycpu()->proc。 - 关中断。在这之后被中断是允许的,因为
proc结构体不依赖hartid, 我们只需要根据hartid找到当前 CPU 正在执行的进程 - 返回结构体地址。
sched()持有p->lock,切换到scheduler()后,会释放p->lock,这两个锁一样吗?– 完全一样- 因为一个进程
p1首先是通过scheduler()获取了锁,然后再通过swtch()返回后释放。 - 而
p1调用sched()回到的scheduler()和当初调度他的scheduler()是同一个 CPU, 所以此时scheduler()上下文的p即p1。 - 此外对于
fork()的子进程,在scheduler()开头遍历时获取p->lock,在forkret()释放。
- 因为一个进程
| 7.2.2 | sleep & wakeup
one process to sleep when waiting for an event and another process to wake it up once the event has happened.
比如以下事件(event)
- waiting pipes
- disk r/w
sys_wait()
loss wakeups (broken sleep: wakeup before sleep).
loss wakeups 的解决方法:
- 调用
sleep()之前必须保证持有调用wakeup()也需要的 conditional lock - xv6 通过修改
sleep()接口,sleep()接收除了 channel 以外的另一个参数,conditional lock
sleep()
- 申请
p->lock, 释放 conditional lock。 - 更新
p->chan = chan,p->state = SLEEPING。 - 调用
sched()让出 CPU。 - 当
p->state被wakeup()/kill()/exit()修改后,会被sheduler()调度,从sched()返回。 - 清空
p->chan。 - 重新申请 conditional lock 后返回。
wakeup()
- 遍历
procp[]匹配p->state == SLEEPING && p->chan == chan, 在这之前会获取p->lock。 - 更新
p->state = RUNNABLE。 - 释放
p->lock返回。
注意:
- 通常在调用
wakeup()之前应该申请相应的 conditional lock,wakeup()返回后释放。 - 多个进程使用同一个 sleeping channel 是允许的,因为在
sleep()返回前会重新申请 conditional lock, 尽管这些进程都会被wakeup()但是只有一个能成功申请到锁。
| 7.2.3 | wait, exit & kill
wait()
- 找到一个
ZOMBIE子进程。 - 释放该进程 (
freeproc())。 - 返回子进程
pid。 - 如果没有没有子进程,或被 kill,则直接返回。
- 调用
sleep()等待子进程exit()时 调用wakeup1()。
注意:
waitoften holds two locks, xv6 must obey the same locking order (parent, then child) in order to avoid deadlock.
waitusesnp->parentwithout holdingnp->lock. It is possible thatnpis an ancestor of the current process, in which case acquiringnp->lockcould cause a deadlock. A process’sparentfield is only changed by its parent, so ifnp->parent==pis true, the value can’t change unless the current process changes it.
- 在判断
np->parent==p后才会申请np->lock
exit()
exitallows a process to terminate itself
- 关闭了所有已打开的文件
- 调用
wakeup()唤醒initproc,之后initproc继续执行wait()。 - 申请
p->parent->lock因为要唤醒父进程。 - 再申请
p->lock因为要更新p->state且重新设置父进程为(reparent to)initproc。注意由于上面的顺序(memory ordering)先父进程再子进程。 - reparent 。
- 唤醒父进程。
- 修改
p->state=ZOMBIE。 - 调用
sched()让出 CPU。
注意:
- 在修改
p->state=ZOMBIE之前唤醒父进程是可以的,因为当父进程从wait()的sleep()返回时,最终会申请np->lock。直到exit()调用sched()之后,scheduler()才会释放该子进程的锁。
kill()
killlets one process request that another terminate.It would be too complex for
killto directly destroy the victim process, since the victim might be executing on another CPU, perhaps in the middle of a sensitive sequence of updates to kernel data structures.
Thus kill does very little:
- sets the victim’s
p->killed- if it is sleeping, wakes it up.(
p->state = RUNNABLE)
注意:
kill直接唤醒当前进程很可能造成目标进程从sleep()中返回。此时很可能当前程序希望sleep()等待的条件还没有达成,因而造成程序错误。- 所以一些封装
sleep()的循环,当sleep()返回时,需要检查p->kill - 对于一些要求原子操作的循环,比如读写磁盘,则相反必须等原子操作完成后再检查
p->kill
| 7.3 | Lab: Multithreading
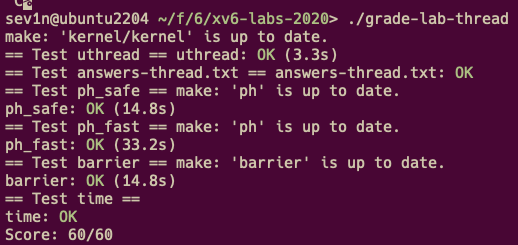
| 7.3.1 | Uthread: switching between threads (moderate)
需要注意的是:
- 初始化
sp=t->stack + STACK_SIZE即sp是递减的。 thread_switch()之后不用更新current_thread = t;因为每次都会从头调用调度器,已经设置了current_thread。
📌 这部分代码在这里
| 7.3.2 | Using threads (moderate)
📌 这部分代码在这里
| 7.3.3 | Barrier(moderate)
只需要遵守调用 wakeup() 的通用方法| 7.2.2 | sleep & wakeup
📌 这部分代码在这里
| 8 | Lab lock 相关
| 8.1 | Lab: locks
| 8.1.1 | Memory allocator (moderate)
- 不用对所有 CPU 等分
freelist,因为不确定 CPU 数量不确定,只需要给 CPU0 分配所有内存,其他的 CPU 调用steal()即可 steal()不能传入调用他时的cpuid并且不遍历这个 CPU。因为很可能steal()执行过程中被调度,更新了freelist(),不遍历会导致丢失部分内存。
📌 这部分代码在这里
| 8.1.2 | Buffer cache (hard)
用哈希表代替原来 buffer cache 的一个双链表,来避免 lock contention
后补
自我感觉这部分(并发,死锁,条件竞争)很难调试,内核出错的位置和代码错误的位置有一定距离,很难通过 gdb 找到。
LEC 15,Frans 教授提到可以通过 “write down assertion for invariants.”
后面再做吧,先把时间留给文件系统和 mmap。
| 9 | Lab fs 相关
| 9.1 | LEC 14 note
|9.1.1| Buffer cache layer
bread()
bwrite()
brelse()
balloc()
bfree()
|9.1.2| inode layer(icache)
ialloc()
iget()
ilock()
iput()
iupdate()
bmap(): 返回 inode.data.logic_block_number 对应的实际块号(block number)。
itrunc(): 释放 inode 的数据占用的所有块。
readi()
writei()
| 9.2 | LEC 15 note & Chapter 8
|9.2.1| logging layer
日志(log) 机制原理:
write-ahead log rule:
- install none of a transaction’s writes to disk
- until all writes are in the log on disk,
- and the logged writes are marked committed.
组提交(group commit):
the logging system only commits when no file-system system calls are underway.
commit order can’t be changed
固定日志大小的问题:
一次
write()的大小不能超过日志定义的块的数量。unlinking a large file might write many bitmap blocks and an inode.
begin_op()
log_write()
end_op()
commit()
write_log(): 把事务(transaction)涉及的块(保存在内存 log 结构体的 log.lh.block[]) 写到磁盘的存放日志块的区域(block 2-31)。
write_head(): 提交点(commit point), 把内存中的日志头写到磁盘的日志头。
install_trans(): 根据日志头把磁盘中的日志写到对应的位置(home location)。
recover_from_log()
|9.2.2| Directory, pathname, file descriptor layer
dirlookup()
dirlink()
namex(): 根据 path 返回对应 icache 地址。
skipelem(): 返回子路径,设置 name。
1 | // Examples: |
filealloc()
filedup()
fileclose()
fileread()
filewrite()
| 9.3 | LEC 16 note
xv6 日志系统的问题:
- synchronize: 必须等当前事务完全结束,才能继续。
- write twice
ext3:
- 异步(async): 系统调用(syscall)返回并不代表需要的事务成功完成,所以用户进程必须考虑到这种情况(
fsync(fd)) - 批处理(batching)
- 一次只有一个 “open transaction”,可以包含多个
syscall
- 一次只有一个 “open transaction”,可以包含多个
- 并发(concurrency)
- 当前 “open transaction” 的所有系统调用结束后才能结束(close)该事务。
- 结束事务后会缓存到内存中,按顺序依次提交(commit)到磁盘的 log 区域。
- 因此 ext3 不像 xv6,必须等当前事务写入磁盘日志区,提交,install,清空日志区完成后再开始。
ext3 的三种模式:
- journaled data: 和 xv6 一样,先写入磁盘日志区,然后再写原本的位置(home location)
- ordered data: 只把元数据(metadata)写入磁盘日志区,而文件数据直接写入原本的位置,但是必须注意要先写数据,再写元数据。
- writeback
| 9.4 | Lab: file system
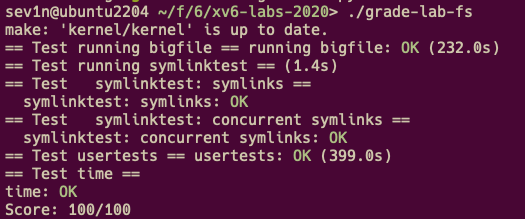
| 9.4.1 | Large files (moderate)
📌 这部分代码在这里
| 9.4.2 | Symbolic links (moderate)
📌 这部分代码在这里
| 10 | Lab mmap 相关
| 10.1 | LEC 17 note
一些通过使用内核提供的虚拟内存原语/特性(primitives) 如: trap, prot1,protn, dirty, map2 (sigaction(), mprotect(), mmap())的算法。
VMA(Virtual Memory Area)
记录并描述一段连续的内存区域,包括起始终止地址,权限,相关文件指针等
| 10.2 | LEC 18 note
micro kernel 暂时忽略。
| 10.3 | LEC 19 note
Virtual Machine!!!!
虚拟化需要解决的三个问题:怎样安全的有效的使得虚拟机(guest VM), 执行指令,访问内存,读写设备。
虚拟机不能运行在宿主(host)内核中。
对应三种虚拟化 CPU 虚拟化,内存虚拟化,I/O 虚拟化
辅助参考:🔗 CTF Wiki-Pwn-Virtualization-基础知识
| 10.3.1 | trap-and-emulate
VMM 完全由软件模拟虚拟机(VM)的指令,也就是完全软件虚拟化 CPU是可行的,并且移植性很好,但是最大的问题是完全由软件模拟会很慢。
当 VM 执行特权指令()时,VMM 从 trap 中接手,模拟执行相应特权指令。
比如虚拟机 ecall,但是会陷入(trap)到宿主机内核(host kernel),然后,VMM 接手,把相关的特权寄存器(scause, sepc, stvac…)复制到 VMM 针对虚拟机模拟的相应特权寄存器中
然后 设置宿主 sepc 为 模拟的 stvac , 设置虚拟机模式(mode bit)为 supervis mode , 然后宿主机执行 sret 返回到虚拟机内核(guest kernel)。
这样虚拟机的内核才能处理来自虚拟机用户态(guest userspace)的 trap。
当虚拟机内核处理结束执行 sret 的时候,同样会陷入宿主机的内核(trap into host kernel), (因为虚拟机内核实际上是运行在宿主机的用户态)然后宿主机内核交给 VMM 处理。
VMM 模拟相应指令(把模拟 sepc 拷贝到 pc,修改虚拟机为用户模式)回到虚拟机用户态。整个过程就像 guest userspace-> guest kernel space -> guest userspace 一样。
另一个问题:页表(pagetable):
VMM 不能让虚拟机设置真正的
satp,这样会使得虚拟机可以访问任意物理内存。同时 VMM 需要把真实的物理地址(Host Physical Address)针对每一个虚拟机,抽象成虚拟机的物理地址(Guest Physical Address)。VMM 因此维护一个对应映射表(shallow pagetable)用于设置真正的
satp使用 MMU 翻译地址, shallow pagetable的内容是 gva:hpa。
最后是设备问题:
- VMM 模拟设备。
- VMM 虚拟设备,并提供接口给虚拟机。因而虚拟机的设备驱动可以与 VMM 内支持的设备进行高效交互,而不是需要陷入 VMM。
- pass-through 例如网卡。
| 10.3.2 | hardware support
intel VT-x
- VMCS
- EPT
| 10.3.3 | Dune: Safe User-level Access to Privileged CPU Features
一个 Linux 模块(LKM),给普通程序提供使用 intel VT-x 的接口,实现或者优化沙盒(sandbox),用户内存管理(memory management),garbage collector 等。
| 10.4 | LEC 20 note
| 10.5 | Lab: mmap
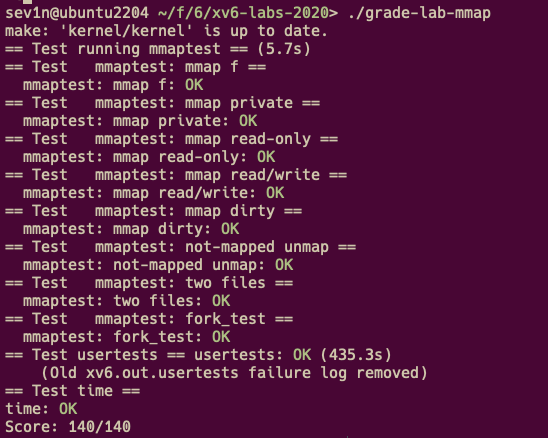
MAP_SHARED 的问题:
- 对于两个进程同时
MAP_SHARED相同文件,之后进程 1 修改文件,该文件在munmap()时写进文件系统,并且进程 2 由于在更新前调用的mmap(),所以不能看见更新,除非进程 1 调用msync()并且指定MS_INVALIDATE标记进程 2 相应地址无效,使得进程 2 重新读文件。 - 所以对于
MAP_SHARED的修改,这里直接写回原来的位置即可,不用管是否其他进程已经mmap()相同文件。 - 不过在 Linux 上测试时发现,进程 2 能够及时发现改变,应该是 Linux 在实现上两个进程用的同一个缓冲区的缘故。
MAP_PRIVATE 的问题:
- 即使 fd 对应的文件不可写,但是如果设置了
MAP_PRIVATE仍然可以。
addr 为 0 的问题:
- 此时意味着 内核必须选择一个”合适”的地址。
- xv6 的
sbrk()会一直增加虚拟地址空间,直到没有内存可以分配。 - 并且
mmap()只是把文件映射到进程的虚拟地址空间,不应该增加proc->sz - 因而
mmap()选择的地址应该和sbrk()分开。
length 和 off 的问题:
- length 不用限制,如果超出文件的大小,也没事,因为会根据 length 分配物理内存。
- off 大于文件的大小则应该返回错误。
readi(), 和writei()都应该基于 off。
munmp()问题:
munmap()之后,访问 [addr, addr+length) 是非法的。- 如果 length 不是页对其的,应该向上取整,因为之前
mmap()的时候不足一页的会补齐。 - 如果
mmap()了连续的 3 页,但是只munmap()第二页,其他两页应该继续有效,这是需要再找一个 VMA,但是mmaptest没有这种情况,所以暂时不考虑。 - 由于我们是延迟映射(lazy mmap) 所以在
munmap()的时候,walk()返回 0 或者PTE_V是 0 是很正常的。。
fork() 问题:
- 子进程可以看见父进程
MAP_PRIVATE的改变。 - 所以子进程应该完全复制一份父进程的 VMA 空间(这里就不实现 COW 了)。
- 如果子进程在
uvmcopy()第一个以后的 VMA 失败了(比如当父进程 mmap 了很大的文件,并且都分配了内存),应该释放在前面分配的 VMA,否则就会损失这些 VMA,这个还没实现。
📌 这部分代码在这里
| 11 | Lab net 相关
后半学期有一门 《网络协议栈分析》的课,留在后面吧。
| 12 | Meltdown & RCU
| 12.1 | LEC 22 note
intel CPU 特性,预测执行时不检查 PTE_U。同时即使非法指令被退回(retired),缓存(cache)的内容仍然在,通过 Flush+Reload,得到缓存的内容进而判断内核虚拟地址的内容。
| 12.2 | LEC 23 note
RCU(Read-Copy-Update) 出现的原因:
- 对于某些共享数据结构,读的时间远大于写的时间,自旋锁(spinlock)互斥了多个读者(reader)同时访问的情况,这是可以优化的,比如通过读写锁(r/w lock)。
- 读写锁同样存在问题:读者会修改引用计数(ref count),导致只读的操作增加了写,同时 n 个 CPU 有 n 个读者同时访问,复杂度是 O(n^2),因为后来的读者会不断的循环
CAS。
RCU 实现方式:
- 写者(writer)仍然需要申请锁。
- 当写者要更新数据时,复制一份原数据,修改完成后提交到原来的位置(单链表,树等)这个提交的过程 Robert 教授称之为 commiting write,这个提交点应该是原子的,所以 RCU 对于双链表不太友好,因为需要修改两个指针。在这个提交点前,新来的读者不会发现修改,提交之后数据被完整的更新完毕。
Memory Barriers:
- RCU 依赖新的项(entry)加入操作的代码执行顺序,必须先更新好新的 entry 再加入,但是编译器和 CPU 很可能重排这些操作,所以需要 barriers 来保证。
- 写者需要在提交点(commiting write)前添加 barrier。
- 理论上,读者也需要先保存读取节点(E2)前一个节点(E1)的地址即
r1 = E1->next,再访问r1,因为可能存在E1->next对应地址的一个旧版本。
写者什么时候释放旧的项(entry):
- 很明显不能使用引用计数(ref count),这违背了 RCU 的原则。
- 如果有 Garbage Collector,也不用担心。
- 读者在 RCU 区域期间,不能被 trap 即上下文切换(context switch)。
- 写者等所有 CPU 都执行一次上下文切换后,释放。